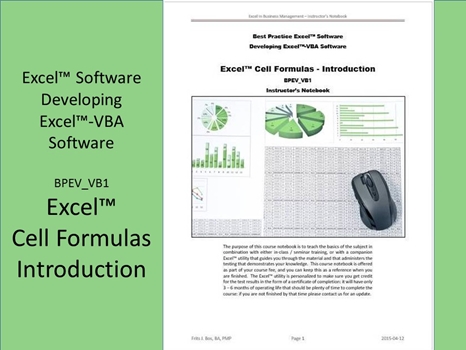
Excel™ Cell Formulas - Introduction BPEV_VB1
This is an Excel™ course that is focused on customizing the worksheet functionality with cell formulas that can deliver a lot of power if you know how that is done. Even plain Excel™ packs a lot of power to allow us to create worksheets that can resolve rather complex problems. There are too many possible application areas in which Excel™ can be deployed, so we stick with using Excel™ for a simple project management business case and a simple business accounting system that are implemented purely in Excel™, and purely to prove the point of what it can do for you.
Obviously we have more sophisticated examples that are pre-programmed in Excel™-VBA that we use in our course material to teach the subject matter. However, here we teach Excel™-VBA as the subject, so we use more simple examples to help you bridge from basic Excel™ to VBA in small increments and to show how, as the application of Excel™ becomes more challenging, the ability to apply other technology to squeeze more power from Excel™ can give you the edge for applications that you plan to use over and over again.
There are applications you only use sporadically – in that case why go through the trouble of the design and implementation of Excel™-VBA code to make those applications permanent? You can do many things with cell formulas that people are unaware of, so the theme of this course is to explore those things. That way you can quickly put a solution together that may not be properly automated, but that uses the full power of Excel™. We use a technique with our simulations: to implement a VBA-based driver program that populates selected data in a worksheet and invokes the worksheet logic to process the embedded cell formulas unique to the underlying model. By doing this, we hard-coded the permanent logic (we call the driver) in Excel™-VBA, while we can maximize the problem specific temporary logic flexibility (we call the model) using cell formulas.
The VBA code can do things we cannot do with cell formulas, such as the manipulation of rows and columns of data, but Excel™ lets us capture that manipulation using macros. As we progress we will show how, in principle, VBA applications can be built around macros that themselves are VBA subroutines. This represents a logical progression from approaching Excel™ as a basic tool to employing Excel™ as a powerful application hosting framework. So let’s explore the basic tool as a start of the journey to master Excel™ to the fullest.
We explore how to build and use Excel™ worksheets as data tables that we can chart. This at once shows the most basic use of data, and how to enter the data, as well as how to present that data for presentations. We let you explore the document window, the ribbons, mini toolbar, and menus that look similar to other MS-Office™ applications. Apart from what makes this a unique system the standard presentation also makes it quite intuitive as you learn the elements.
Typically a new workbook is presented (Book1) with 3 worksheets (Sheet1, Sheet2, Sheet3) to get you started. We review how to manipulate the worksheets and how to use the buttons on the ribbon to perform a large number of diverse tasks that are organized in the different groups within different ribbon tabs. To expedite this course we have prepared a workbook BPEV_VB1 with many worksheets to show the elements of what you need to learn in this course, and to save time.
In this session we concentrate on the formula window to show the use of simple expressions and functions that turn the worksheet into a powerful tool for business. We explore worksheets, “Accounting” and “Business Case” as two examples of how you can program Excel™ with just formulas yet create powerful tools that offer surprising features. We will also leave you with some challenges for building your own solutions for other typical applications.
We review basic operations and functions (even embedded functions) and how Excel™ interprets the specifications, so that there are no surprises. We show how Excel™ will resolve cell references, and how you can hard-code those references, as well as how you can “freeze” the column and/or cell reference in order to apply a single parameter value to a series of calculations, and more.
Here we explore how to use Excel™ as an analytical tool and to present a series of data in graphical format. Excel™ is the ideal tool for “What If” analyses we often come across in business. An important part of this task is to take the time to understand the data before you decide how to use various tools to manipulate that data. Often data must be grouped, or a breakdown is used to show the composition of data, depending on what the audience needs to focus on. We look at applications like creating the payment schedule for a loan or a mortgage (to see the difference) to see the application of tools that can be created entirely in cell formulas.
Charts are a visual representation of data, to make it easier to show what the numbers mean. Although people want to see the data, they cannot always grasp exactly how that is important to them until it is summarized in a visual format. Excel™ offers an impressive array of chart options that we can explore and maybe incorporate into our applications as analytical presentation tools. We also look at sorting tables and querying tables to enhance the capabilities of our workbooks. We consolidate this course by looking at a number of challenges that you can resolve in your own time as a way of reinforcing the things you have learned in this course.
Learning Formats BPEV_VB1
This course is currently available in a classroom setting (public or company private) with approximately 15 contact hours. The training should be followed by independent learning to gain hands-on practice with what has been learned in class. Therefore we recommend at least a one week gap to let the student master the subject matter before taking the next course.
PDF – Certificate Of Completion
Each course offers a certificate of completion that identifies the course, the student, and a brief description of the course. To receive a certificate the student must have attended at least 80% of the course sessions. This personalized certificate is forwarded to the student by Email.
PDF – Course Notebook
Each course includes a notebook in PDF format that provides the minimum knowledge the student must master in order to obtain the certificate. In the notebook you will find references to other study materials. Students receive the notebook by Email when their registration is confirmed.
PDF – Program Overview
An overview of this study program can be downloaded from the website by right-clicking on the program link on the enquiry page.
PDF – Current Training Schedule
A list of upcoming training sessions can be downloaded from the website by right-clicking on the schedule link on the enquiry page.
Registration – Service Providers
To register for any training course please look on the enquiry link page of your service provider (from where you accessed this website). On the page you will find a registration request form where you can order the course that you are interested in. The availability dates will be provided to you, along with payment instructions if you decide to go ahead.